


Snow sculptures are three-dimensional objects that use snow as the primary material. Functional or decorative, they add a new aura to events but have a limited lifetime. Winters remain preferred for snow sculptures and, they can last through months in winter.
Typically, artists create ice sculptures for high-profile events, fancy restaurants, private parties, and conventions. Moreover, snow sculptures vary in size from small centerpieces to gigantic masses. In smaller statues, one removes pieces of ice from a main central sculpture, while in larger volumes, water joins blocks.
Raw Materials
Though snow sculpts in various temperatures, it changes according to the heat in the atmosphere. One needs to select snow blocks with caution to make them free of undesired dust and impurities.
Moreover, experiment with tools and pieces of equipment. Use different kinds of shovels and carpentry tools to move and shape the snow. You can even use curry combs and dustpan brooms to shave off the snow and add drama to your sculpture. If you are a beginner, start with a smaller object and move up as you practice.
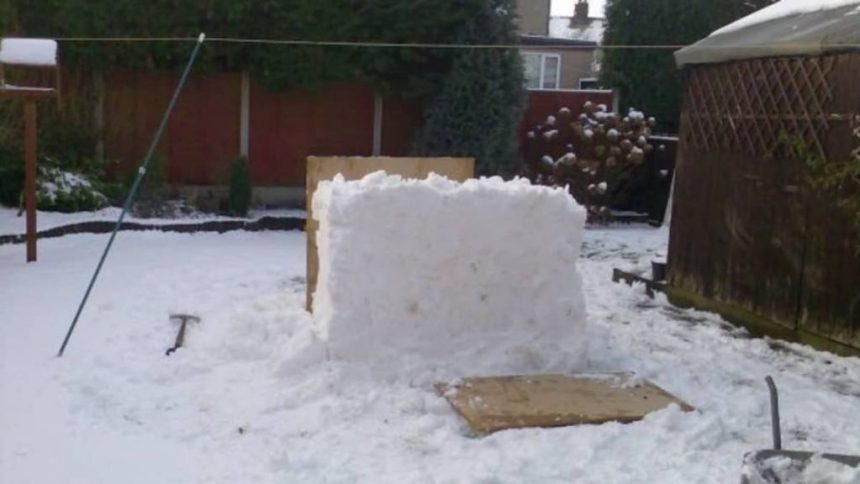
Start With a Plan
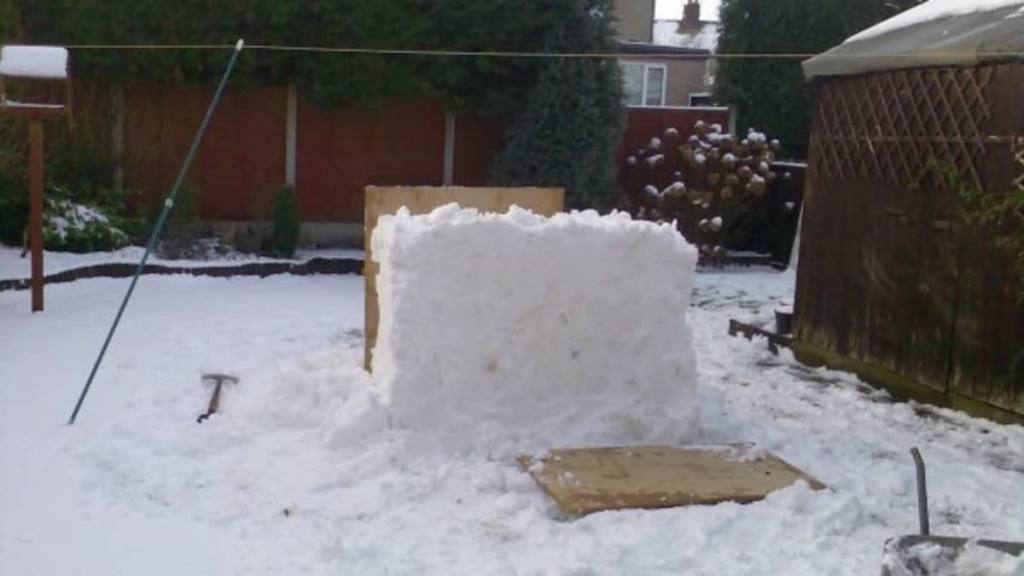
Before you begin your project, work out a plan or have a sketch or any visual reference ready to help you out. When outdoor temperatures hot a sweet 20°F, take out your spade and turn your snow sculpting ideas into reality. Make a compressed block of snow, build a frame and reinforce through it to make the weight of the sculpture. Now, pour up the snow into your form and stamp on it until it is heavily compressed. After finishing, remove the formwork.
Use chainsaws to disperse off large chunks of snow. You can even choose metal end ice choppers to mold inaccessible places. Even chisels and drywall saws sound perfect for detailed work. Pick up any of the tools and start chipping slowly and steadily at your block of snow. Once complete, they feature in some cuisines to enhance food presentations of cold kinds of seafood. Heart, dove, and swan-shaped sculptures light up the decorations for wedding receptions, too.
How Much Time Does It Take?
If there are two to three team members, you will need about 100 hours to build a competition-level sculpture from conceptualization. Workers use strong scaffolding around the blocks, enabling them to reach every part of the sculpture. Thus, they detail out every module. They use ice chippers to eliminate large amounts of snow, while chisels add detail and remove small snow parts effectively.
Workers use sheetrock saws to cut through the thick snow, while machetes create curves and cut through small modules. They use every tool from sandpapers to truss plates and fishing augers to hatchets for the snow sculpture. Moreover, there are some tips to speed up your work.
Do Not Over Expect
Only the initial idea needs to be creative to a certain extent to grab people’s attention. Create sculptures of size and perception that make people turn around in awe, but do not overdo details and make it look imposing. It is a great practice to start up with a detailed sketch or model before the actual sculpting process to save up on time.
Remove The Extras
Remove the unnecessary chunks of snow beforehand to save up on time later. Sculpt out all the snow and let the only ones necessary for the sculpture remain so that you can move towards inward detailing later.
Use The Appropriate Tools

Ensure the sharpness of your tool and do not leave any unfinished surface to boost up work. When the snow goes completely packed and stands stiff as stone, you are in the right direction.
Use The Correct Method
If you are working with snow and the snow goes dry or powdery, wet it lightly using a garden hose to make sculpting easy and quicker. Use a chainsaw to remove the frozen snow instead of wasting time removing it with your hands. Wet both the surfaces if your snow piece breaks – the broken one and the solid piece, so that it sticks better and faster, instead of wasting time in holding the breakage until it sticks. Water sticking will save you a lot of time.
Final Word
Typically, snow sculptures take about 100 hours to complete on a competition level, but this time reduces considerably with the aforementioned tricks. Also, time depends on the scale, and, for small home sculptures, it will take about five to six hours to complete a whole structure.


